Travel Dates: February 2026
What to do in Torres del Paine
Difficult hike:
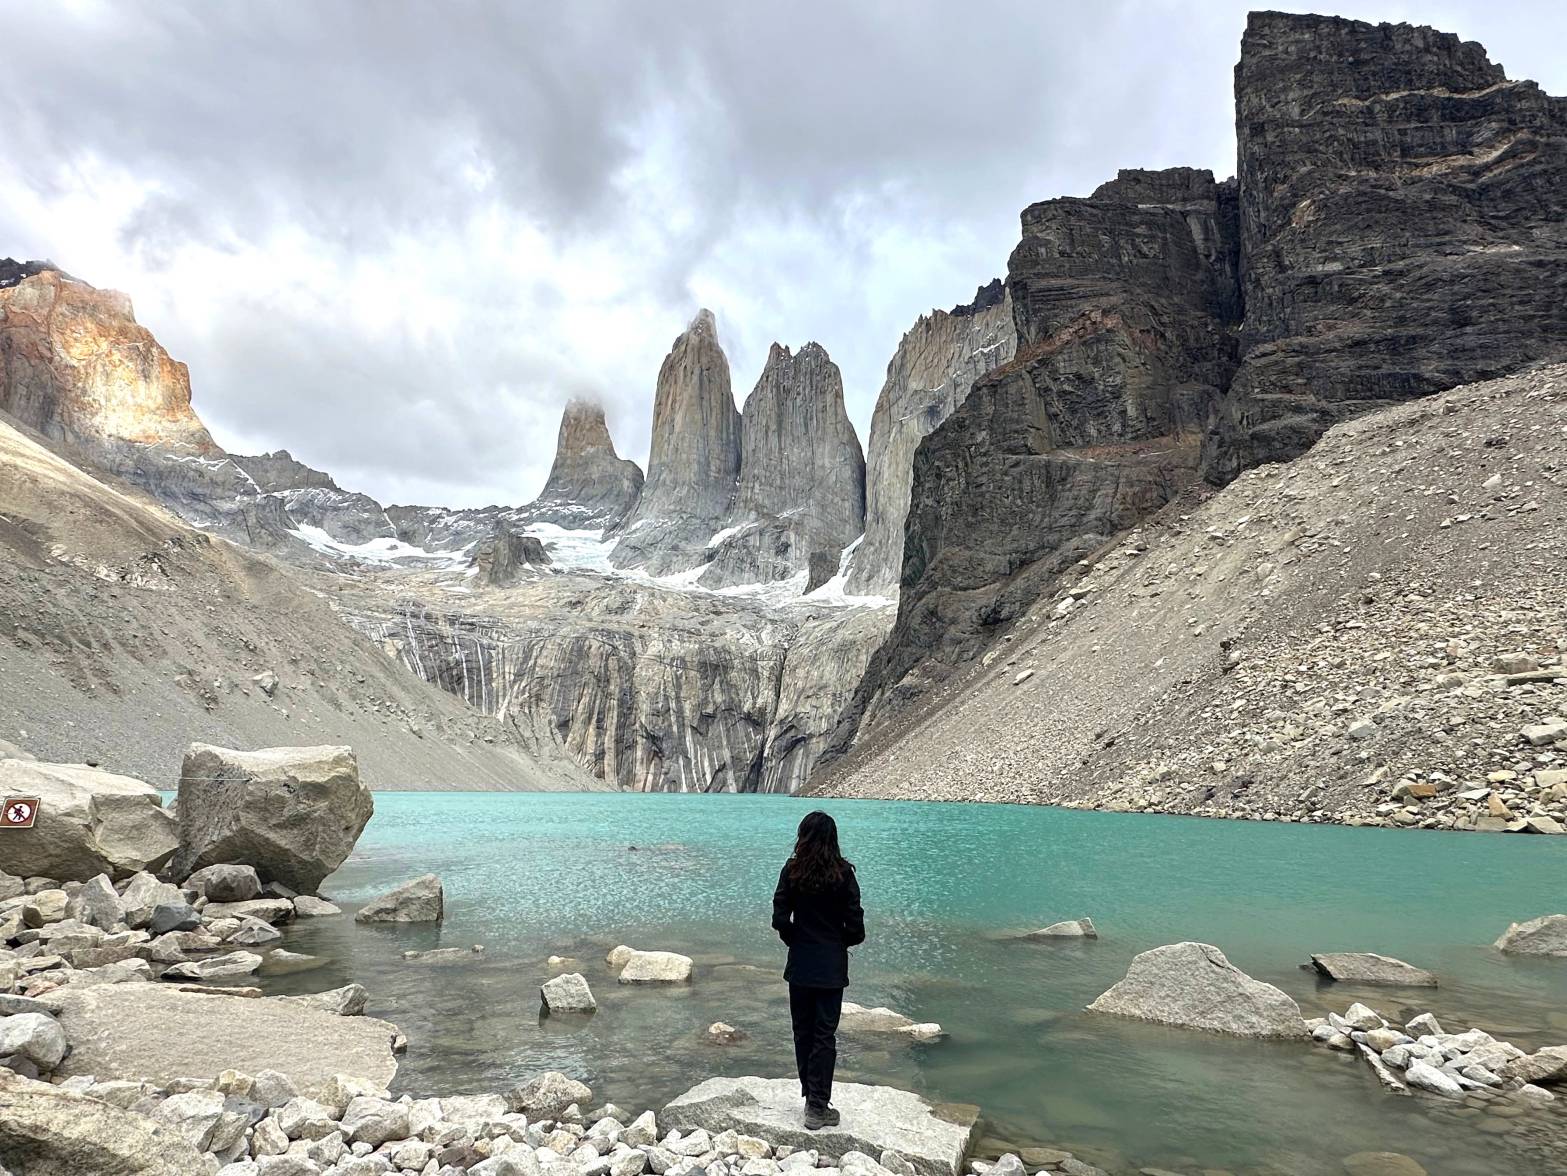
Mirador Las Torres Base – Most people who visit Torres del Paine will do this hike as it is the park’s most iconic trail. We left Cerro Castillo at 6:00am to get an early start and avoid the tour buses, which can make the hike very crowded. We reached the Laguna Amarga entrance (where park passes are checked) before it opened at 7:00am, so we continued driving to the Welcome Center. This is where you park to begin the hike, and there are free restroom facilities available.
If the parking lot at the Welcome Center is full (it wasn’t when we arrived), you’ll need to park near the Laguna Amarga entrance and take a paid shuttle to the Welcome Center to start your hike.
The trail begins just outside the left door of the Welcome Center—we started hiking around 7:30am. Follow the signs for Mirador Las Torres, and after about 20 minutes you’ll pass Hotel Las Torres. This is where the real hike begins. After about 15 minutes, you’ll reach a wooden bridge that allows only two people at a time. From there, the trail climbs uphill for about an hour. The path becomes rockier, and you’ll notice multiple routes heading upward. They all eventually merge, so just keep climbing.
This section brings you to the Windy Pass, and you’ll likely feel the gusts as you approach. From there, continue for another 30 minutes to reach Refugio El Chileno, a mountain refuge and campsite. It’s a great spot to take a break, grab something to eat or drink, and use the restroom. Keep in mind that if you don’t make a purchase, there is a 2,000 Chilean peso bathroom fee, payable in cash only.
We resumed our hike after a 30-minute break, just after 10am. For the next hour, you’ll walk through the forest, climbing a series of hills. Eventually, you’ll reach the start of the rock scramble. There’s a nearby campsite where you can use a free restroom, though there is no toilet and sink. Keep in mind there are no facilities at the top near the base of Los Torres.
For the final stretch, we scrambled uphill for about an hour, tackling what is arguably the most demanding section of the hike. The slope is steep, with no shelter from the wind or sun, making the ascent feel even more intense. But once at the summit the sweeping view of the towers above the glacial lake makes the entire climb worthwhile. We stayed for about 30 minutes before heading back on the same trail.
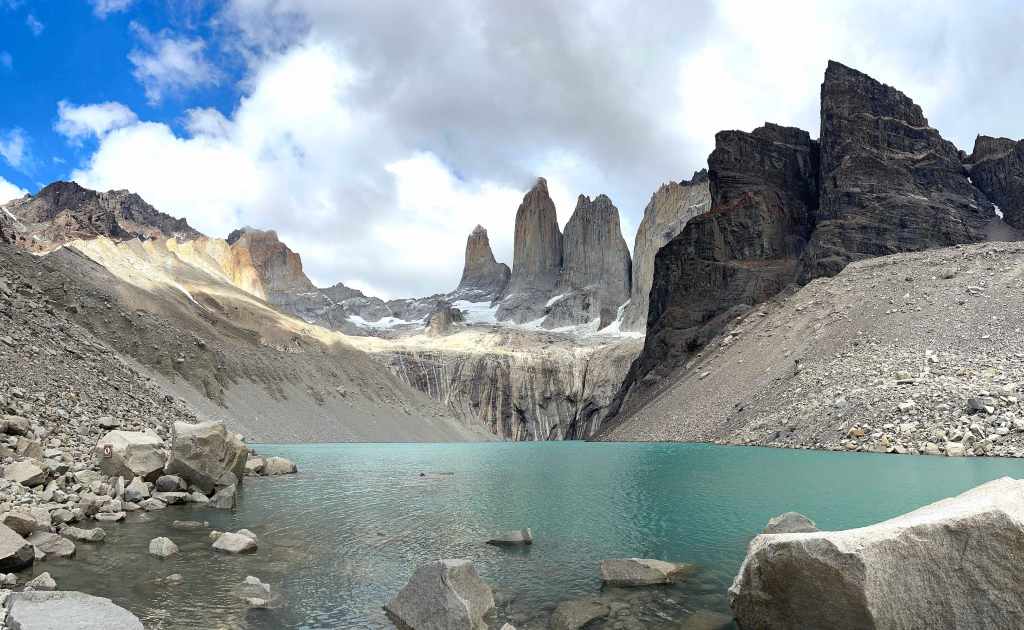
We arrived back at the Welcome Center at 5pm. Our total hiking time was 8 hours and 30 minutes, with the remainder of the time spent taking breaks at the refuge and at the base of the towers.
Some tips and advice for this hike:
- Make sure to bring plenty of water. We carried a total of 4.7 liters between the two of us, and it was just enough, though we had to conserve slightly toward the end but made it work. I wouldn’t recommend bringing less, and if you tend to drink more water while hiking, you’ll definitely want to pack extra. That said, Refugio El Chileno does have tap water available for refilling if you’d prefer not to carry all of your water from the start.
- Be prepared for changing weather conditions. Wear layers and expect strong winds and possible rain. At other times, when the sun is out, there’s very little shade, so bring a hat and apply sunscreen.
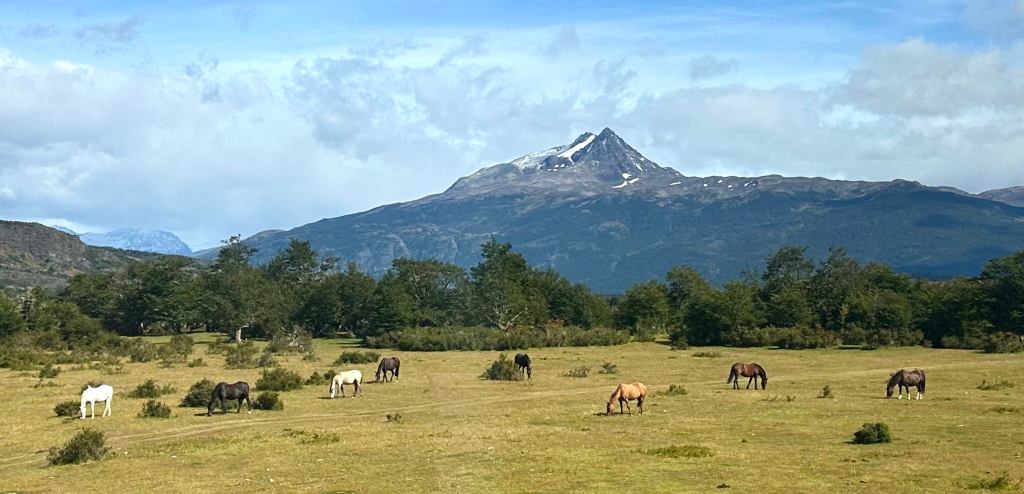
- During the first half of the hike, up to the refuge, horses use portions of the same trail as hikers. Be mindful of your footing, as there’s horse manure along the path.
- The trail is well marked throughout the hike. If you’re unsure which way to go, look for signs pointing to Mirador Las Torres or for the wooden trail markers along the path. It’s also a very popular hike, so you’re unlikely to be alone for long.
Easy hike:
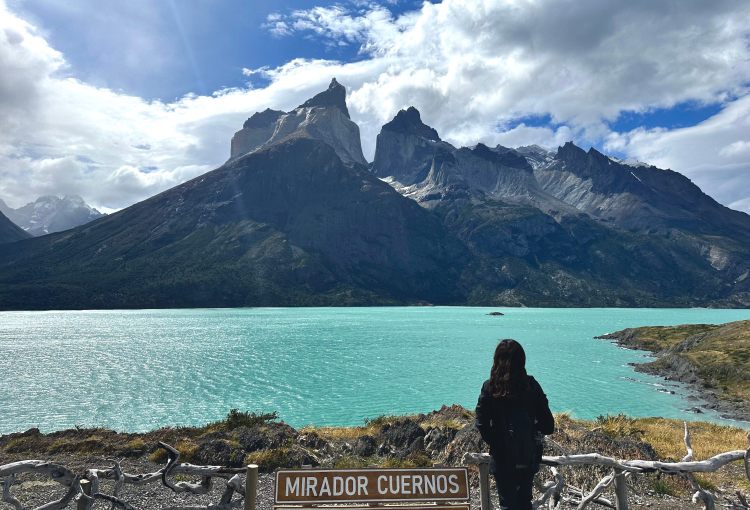
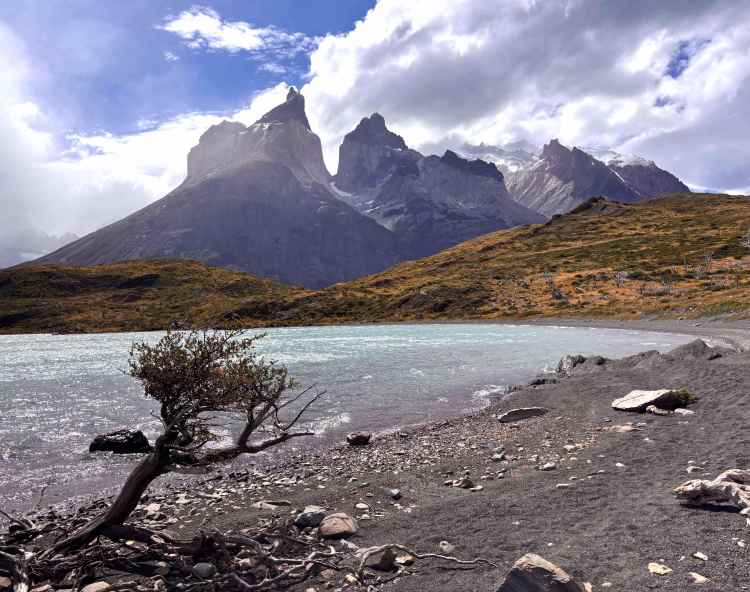
Mirador Salto Grande & Mirador Cuernos – If an 8+ hour, challenging hike is not up your alley, don’t miss the beautiful views at this hike. Before driving to the Salto Grande parking lot, consider stopping at Estancia Pudeto to grab food or drinks or use the free restroom. This is also where visitors board the catamaran to access the hikes to Glacier Grey and Mirador Francés/Mirador Británico.
From the Salto Grande parking lot, it’s about a 15-minute walk over uneven terrain to reach the waterfall viewpoint. If you’re up for a longer hike, follow the trail to the right toward the sign for Mirador Cuernos.
The hike is relatively flat with some hills. The only factor that could make it challenging is strong wind and sun, since the trail is exposed with no shade. It took us about an hour to reach the viewpoint (roughly two hours round trip) due to our injuries; most people may complete it a bit faster under normal conditions.
Viewpoints with minimal walking:
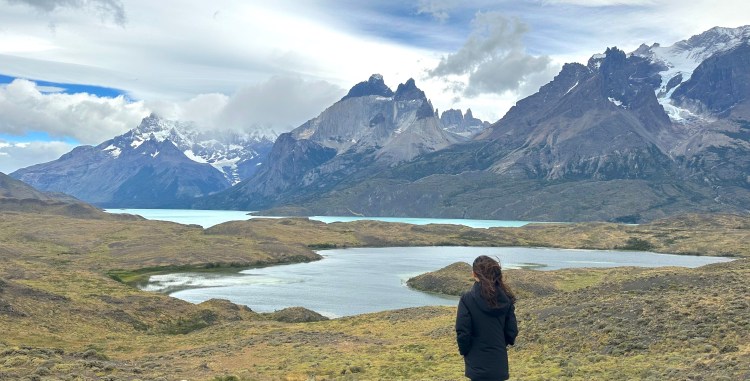
Mirador Nordenskjöld Lake – This is my favorite view in Torres del Paine—no photo can truly capture the scale and grandeur of the mountains in person.
Mirador Río Serrano – From just outside Villa Río Serrano, you’re treated to breathtaking views of the Serrano River winding through the landscape, with the majestic peaks of Torres del Paine in the distance.
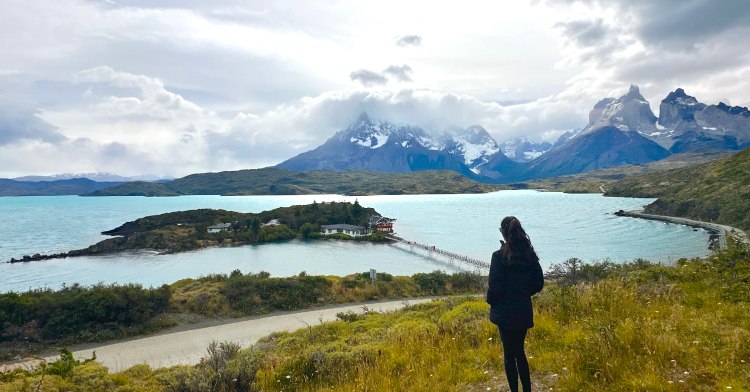
Mirador Cóndor – At the start of the hike, right by the parking area, you’re greeted with a spectacular view of Lake Pehoé. It’s not necessary to tackle the steep trail up to the actual Mirador Cóndor viewpoint at the top of the mountain, which can take at least 1.5 hours round trip.
Hostería Pehoé – You can walk along the pedestrian bridge toward the hotel for beautiful views of Lake Pehoé and the surrounding mountains.
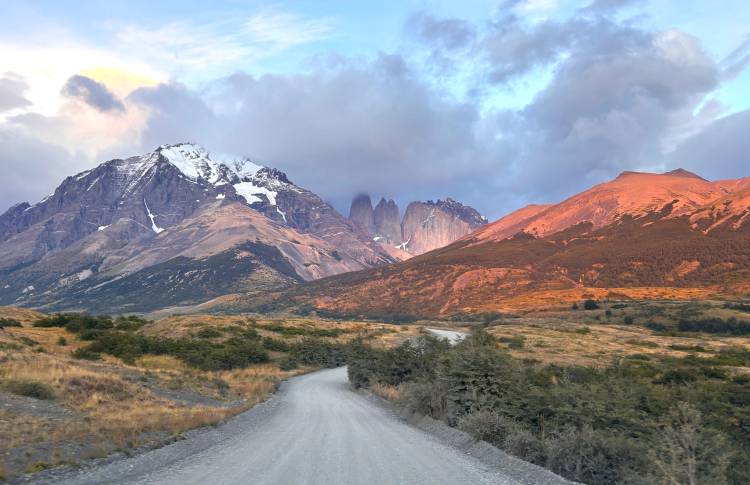
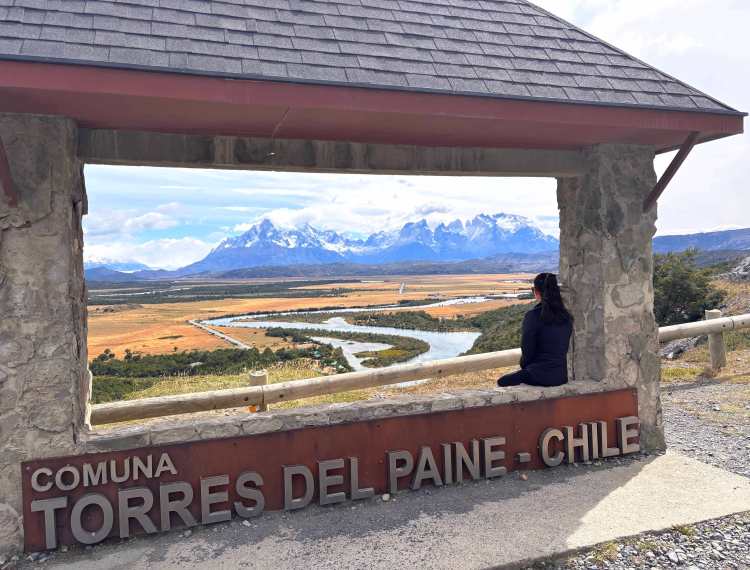
Laguna Azul – Drive toward Camp Laguna Azul. This is a great stop if you’re skipping the Mirador Las Torres Base hike, as you can still see the towers from a distance. The area has many pot holes along the road, so it’s best to use a vehicle with high ground clearance and drive slowly. Keep an eye out for guanacos along the way to the lake, as they’re often spotted on the mountainsides.
Laguna del los Cisnes – Stop here for bird-watching—you may also spot flamingos!
Other information about Torres del Paine
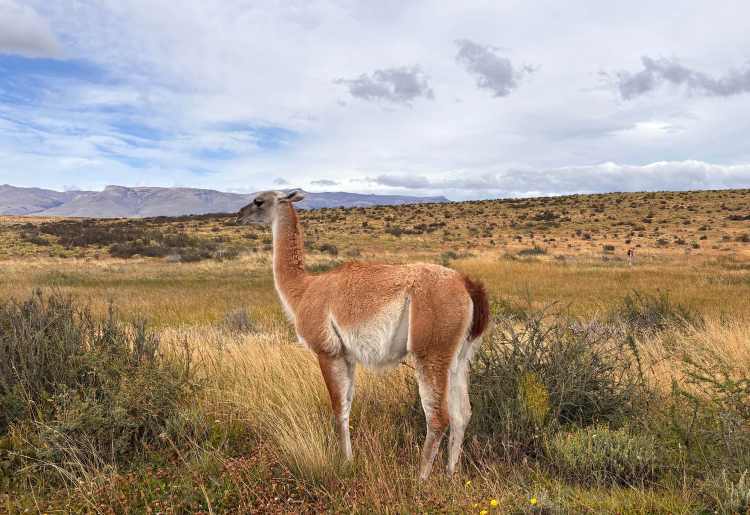
Wildlife – Guanacos, condors, and pumas are the main animals in the park. Spotting guanacos is relatively easy—we saw the most along the drive from Cerro Castillo to Lago Amarga on the eastern side of the park. Condors are a bit trickier to spot without binoculars; we think we saw some at Mirador Río Serrano one early afternoon. Unfortunately, we weren’t lucky enough to see any pumas. To increase your chances, you’ll need to go at dawn or dusk or join a guided puma-spotting tour.

Park pass – Make sure to purchase your park pass online in advance. Passes are valid for a specific day and are available for either fewer than three days or more than three days. You’ll need to scan your pass each day when entering the park. There are several entrances, and while you might be able to drive through without stopping, you should go inside the entrance building to have your pass scanned. Free restrooms are also available at all park entrances.
What to do outside of Torres del Paine
Pingo Salvaje Estancia – If you have the time, I highly recommend going horseback riding in Patagonia. We contacted Pingo Salvaje a few weeks in advance to book a 3 hour tour for $75 per person. They offer both morning and afternoon tours, and there’s a restroom available on-site.
After checking in, we received our helmets and leather gaiters, followed by a brief session on how to use the reins to guide the horses. Then we mounted up and were led through the hills and up the mountainside, enjoying stunning views of Lago Sofía in the distance. The horses are trained to follow each other, so no prior experience is necessary, and most riders let their horses move at their own pace. We did let our horses gallop a little when we had the chance. It was a fun experience that gave us Red Dead Redemption 2 vibes.
Mylodon Cave Natural Monument – If you have extra time, this is a quick and easy stop for 12,000 Chilean pesos per person to see a large cave where the skin of a giant sloth was once discovered. It’s interesting from a paleontological perspective, but if you’re not particularly interested, you can skip it.
Where to eat in Torres del Paine
Lago Grey Hotel Restaurant – I highly recommend coming here for both the delicious food and the stunning views. The hake with pil-pil sauce was excellent, though a little spicy, and the Aperol Sidra was a refreshing drink. We also tried the ribeye with chimichurri sauce, which was okay, but the corn purée side was absolutely delicious. We didn’t have a reservation and were able to snag a window seat at lunch with views of the lake and mountains.
Most people visit Hotel Lago Grey to take the glacier boat tours. If you’re not doing a tour, you can still enjoy views of the glaciers in the distance by walking behind the hotel building.
Lodge Morrena Torres del Paine Restaurant – We ordered the gratin king crab and the traditional pastelera de choclo, and both were heavy but delicious. We also tried the Calafate Sour, a tasty fruity sour cocktail. If you plan to dine here, be sure to make a reservation in advance.
Alveoli Serrano Restaurant – We tried the abalone appetizer, guanaco stew, and salmon with squid ink pasta. The abalone had a seafood taste, but it paired well with soy sauce if you ask for it. The guanaco stew was a bit tough, and the salmon was slightly undercooked. You don’t need a reservation for dinner here.
Artisan gelateria Aluen Patagonia – If you’re in Puerto Natales and craving ice cream, this is a great gelato spot. I especially recommend the passion fruit (maracuyá) flavor.

Hake with pil-pil sauce, ribeye, and corn puree at Lago Grey Hotel Restaurant 
Gratin king crab and pastelera de choclo at Lodge Morrena Torres del Paine Restaurant 
Abalone appetizer at Alveoli Serrano Restaurant 
Salmon with squid ink pasta and guanaco stew at Alveoli Serrano Restaurant 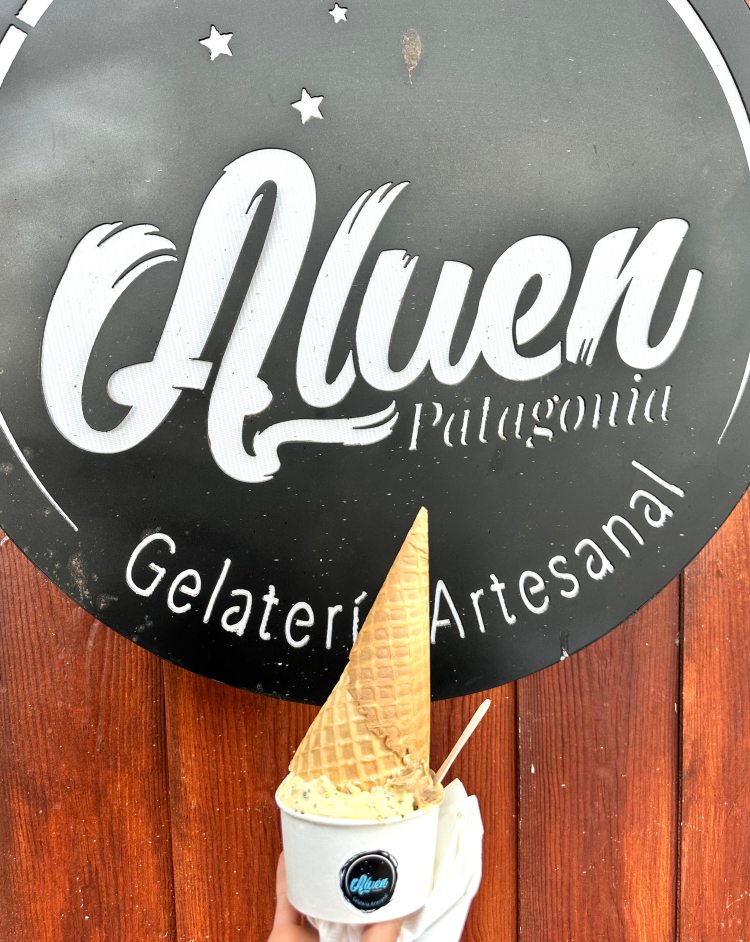
Passion fruit gelato at Artisan gelateria Aluen Patagonia
Where to stay in Torres del Paine
TLDR: Where to stay depends on whether you have a car and on your itinerary. If you have a car, it’s best to stay close to the park to minimize driving time. If you don’t have a car, staying in Puerto Natales is more convenient, since that’s where most tour operators will pick you up.
Riverline Lodge Torres del Paine – Located in Cerro Castillo, this lodge is a great choice if you’re planning to do the Base Torres hike, as it cuts travel time in half compared to staying in Puerto Natales. It’s also conveniently located for visiting sites on the eastern side of the park. Breakfast is included, and if you need to leave early, they can prepare to-go bags—just request them a day in advance. Dinner is available for purchase, but you need to order at least an hour before mealtime. There’s free water and hot water with tea available throughout the day, and a communal fridge is provided. Our room was near the front desk, so Starlink (satellite internet) worked fairly well. The only downside was that there were some flies in the room.
Lodge Morrena Torres del Paine – Located in Villa Río Serrano, this lodge is a good choice if you’re visiting the western side of the park, such as Lago Grey and the glacier tours. Breakfast is included, but dinner comes at an additional cost and requires a reservation in advance. The lodge has both Starlink and Wi-Fi, but neither worked in our rooms. We had to go to the common area near the lobby for Starlink access. There are no elevators, so if your room is on the second floor, you’ll need to use the stairs. Hair dryers aren’t provided in the rooms, but can be requested at the front desk. They do require toilet paper to be thrown in the garbage bin rather than flushed.
Best Western Patagonia – If you don’t have a car, Puerto Natales is the best place to stay, since all the tours pick up from town. The Best Western is not in the town center, so I wouldn’t recommend it if you want easy access to restaurants, shops, and supermarkets. However, it’s conveniently close to the airport, which is why we chose to stay there to catch an early morning flight.
The hotel offers free breakfast, with dinner available for purchase. Wi-Fi is readily available throughout the property. There are no elevators, so if your room is on the second or third floor, you’ll need to use the stairs. Guests are also asked to dispose of toilet paper in the provided garbage bins.
Miscellaneous tips and advice when traveling to Torres del Paine
Rental car – The roads in the park are gravel, so I recommend using an SUV or a vehicle with good ground clearance. And make sure to fill up with a full tank of gas in Puerto Natales, as there are no gas stations once you leave town. In smaller towns like Cerro Castillo, locals or establishments may sell a bit of fuel, but it will often cost at least twice as much, if not more.
Cell service – Once you leave Puerto Natales, cell service becomes limited and is virtually nonexistent inside the park. Be sure to download important items to your phone, like offline Google Maps, or print anything essential, such as your park passes, before you go.
Weather – The weather in the park can be unpredictable and can change throughout the day, and the wind here is no joke. I recommend using Windy.com to check weather and wind speeds in Torres del Paine. This can help you decide which days to do certain hikes and which areas of the park to visit. Winds of 20 mph or higher require caution, and 30 mph or more can make hiking very challenging.
Clothes – Wearing layers is strongly recommended, as temperatures on the hikes can swing from cold to hot. Make sure your outer layer jacket is suitable for rain and wind, and consider pant shells or hiking pants that offer similar protection. Don’t forget sunglasses and sunscreen for sunny stretches, and bring a hat. Beanies or balaclavas are ideal for cold, windy conditions, while wide-brimmed hats are great for when the sun is blazing and there’s little shade on the trail.
Comfortable hiking boots are essential. I unfortunately got severe blisters during the trip, which affected the rest of my time in Torres del Paine. Hiking poles are also highly recommended.
Money – Credit cards are accepted at most places. There are a few exceptions such as the bathroom at the refuge, which requires cash. At restaurants, tipping is generally requested and 10% is the standard.
Language – While most tourist locations have staff who speak at least a bit of English, there were several instances where knowing Spanish was definitely helpful. In the worst-case scenario, if you don’t know Spanish, you can use a translation app, but overall, you should be fine.
Airport liquids – When flying out of Puerto Natales, you can bring a bottle of water in your carry-on. However, when you’re flying out of Santiago back to the United States, large liquids will be checked and removed at the gate when you board, so you won’t be able to bring them in your carry-on.
